Paper Bead Jewels
I have been trying quite hard to be crafty and patient. I am not great at both but I know that practice helps both these areas tremendously. Patience is really a must as I have multiple half done projects around me. I start and then I just let it lie untouched. Consistency and patience are really my pitfalls and I am trying to work on them. 
Well I discovered Shruti’s Mindful Meanderings sometime in late February and have been meaning to take part in the Artsy-Craftsy. I had ideas for the previous challenges but kept giving the standard lack-of-time excuse but I made it – well almost. It is still officially 19th April when I am submitting my entry for the April Artsy-Craftsy Paper Mache
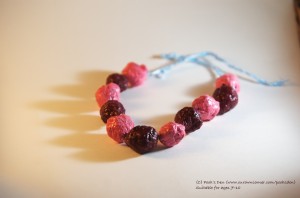
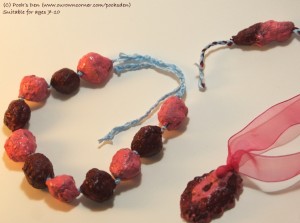
I got the idea for paper beads from here and just adapted the instructions to be more kid-friendly. It is quite simple but adult supervision is necessary. Here are the steps just in case someone is interested.
1. Tear paper into bits
2. Pour boiling water to cover it
3. Let it sit for 1 hour
4. Mash the soggy paper so that it disintegrates
5. Drain as much water as possible and add a little clear glue to help beads hold shape.
6. Shape beads around toothpicks and skewers. This step I called it kabab making. The thickness of the toothpick/skewer you use to shape the beads will be the width of the hole for threading the beads.
7. Reshape and squeeze out some more water after an hour or so
8. Let it dry – mine took around 4 days
9. Paint and add a coat of varnish
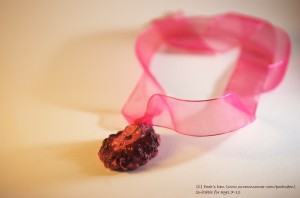
10. String through ribbons, yarn, or anything else you prefer.
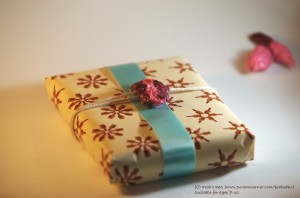
These will be great as gift tags too.


btoteva
March 10, 2012 at 9:40 pmI vove such paper crafts!
pooh
May 4, 2010 at 9:01 amOkie here we go. I added a bit of glue as mentioned in step 5. You need to choose something that dries clear. It was little probably like 1 tablespoon. I just eyeballed it and mixed after draining the water from the soaked paper pulp. It worked for me. And when you make it to kebabs it will be oblong at first. After an hr of shaping it, go back and squeeze it and reshape it. Continue doing it till you are kind of happy with the shape. Also they photograph well – when I look at my beads I see so many imperfections and they are completely round like they seem on the photos.
Let me know if you have any further questions
G
May 4, 2010 at 12:19 amAnd I am back with a big big problem. 🙁 I tried this with your kebab technique. Now my problem is that the pulp does not mould properly around the stick. It falls off when I am trying to roll it around. Did you use any adhesive?
And did you get perfect circles? With this kebab technique I am getting a lil oblong shaped beads!
I know I am sounding like an eight year old, but I am artistically challenged, so need help…. 🙂
Pooh's Den » Blog Archive » Saturday Update – Week 15
May 1, 2010 at 10:07 am[…] my handicraft projects – My paper mache beads won the 3rd prize in April’s Artsy-Craftsy? Â I got a tutu done for the little girl! More […]
pooh
April 29, 2010 at 3:46 amWelcome G. I thought about using a drill but I wanted a kid-friendly project so decided to shape them around the skewers. I actually made some without holes which were later dumped as it is just too much work to get out the drill and drill holes into the beads
G
April 29, 2010 at 12:22 amHey!! You know what? This is god-sent, really! I ended up making a lot of beads, dried them too but then did not have any tool which would drill through them to make a hole. Disappointed, I have left my project half done, waiting for a mini drilling machine of sorts. 🙁
The toothpick/skewer idea is swell! I am going to try that thing right away. 🙂 Thanks God i landed here (from Mindful Meanderings) 🙂
Pooh's Den » Blog Archive » Week 14
April 24, 2010 at 12:39 pm[…] my handicraft projects – Did you see my paper mache beads? I got more coming […]
pooh
April 23, 2010 at 6:28 amthanks sss! wow dog n dino! great! can’t wait to see them
sss
April 23, 2010 at 4:19 amhey pooh cool and thanks for the idea dear, summer holidays my toddler had lots of of fun with ur arty idea and we did a dog and dino instead of necklace out of ur idea will upload pic soon
pooh
April 22, 2010 at 9:47 pm@Momo’s Ma – Thank you!
@Uma – Welcome to Poohsden and your comment strangely ended up in my spam and I have comment moderation for first time commentators. Do let me know how your clay jewelry turns out
Uma
April 22, 2010 at 12:20 pmwhere did my comment go?
Uma
April 22, 2010 at 12:19 pmHey, hopped over from Shruti’s… lovely place yours…
And I must say the jewelry looks classy! I have some clay left and am going to give this a shot!
Momo's Ma
April 20, 2010 at 5:31 amhey, such a cool idea. it looks so classy..
pooh
April 20, 2010 at 4:34 am@MindfulMeanderer – Thanks!
@Shankari – Welcome to Poohsden and thanks!
Shankari
April 20, 2010 at 3:43 amHello! It is my first time here. The jewellery looks awesome! Very well made..
MindfulMeanderer
April 20, 2010 at 12:55 amgot it thanks. didn’t realise that they enlarge once clicked. its up on my blog. check out. 🙂
MindfulMeanderer
April 20, 2010 at 12:51 amcan u pls post a bigger size of the pic .. or mail it to my email ID. I’m unable to add it to my post 🙁
MindfulMeanderer
April 20, 2010 at 12:47 amLovely! I’m adding them asap. 🙂